


Find ONE Good Keyword
Since ArticleBuilder creates content, selects the title and builds links to the
articles that it posts to your blogs for you without you having to lift a finger,
you don’t have to deal with keyword research on your internal pages. That
means the only keyword research you need to do (and you don’t even really
“NEED” to do it… it just helps,) is for the homepage.
To do this use KeywordCanine but you can also use the Google Keyword
Tool and stick in any one of the general categories that ArticleBuilder covers.
Just go to the homepage of ArticleBuilder to find the list.

global monthly searches and that is fairly general… just about any topic
under that niche would fit “under” it.
Then grab all of those keywords and start plugging them into the keyword analyzer of KeywordCanine until I find one that has a “Moderate” to “Easy”
competition rating.

by the Google Keyword Tool’s competition metrics and find one that has
“Low” to “Medium” competition.
Once you have found one, that’s what you target the homepage (root) of your new
blog to. Of course you can get MUCH more in depth and technical with your
keyword research and there’s nothing wrong with that. But just go for volume
and don’t waste much time.
If you prefer to do your own keyword research method, that’s perfectly fine.
This is just a “quick and dirty” method to use for quick, little profitable
sites.
Find and Register a Domain
Once you’ve found your main keyword, you’ll want to register a domain for
it. You probably want an EMD’s (Exact Match Domains) and as these still do help a bit with
ranking for your main keyword (although it’s not quite as big of a boost as it
once was.)
So, if your keyword were “Vegetable Gardening App” then the EMD would
be vegetablegardeningapp.com or .net .org whatever you can find. But if
you can’t find an EMD it’s not the end of the world. Just find something
close and register it.
If you use KeywordCanine, it will tell you what EMD’s (if any) are available.
But again, you can also do that manually.

Now it’s time to get the site up and configured. Once you have your new site
registered, the nameservers pointed to your hosting account/server and the
hosting account setup, it’s time to install WordPress.
Once you have WordPress installed, there are a few very specific things to
do in order to make it more SEO friendly:
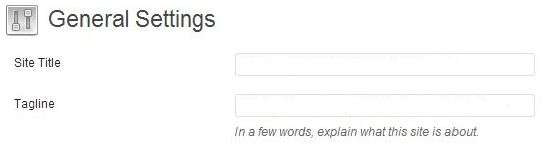
1. Change the permalinks to “Post Name”

relevant, tagline.
theme that hundreds of thousands of spam blogs use.
4. Install a random posts plugin (which one you use doesn’t matter) to
display random posts in the sidebar and under each post.
This helps improve the internal linking structure drastically and distributes
site authority throughout the site very well. This is important because
ArticleBuilder automatically builds backlinks to the posts that it creates and
the authority from those backlinks is now able to flow through the site,
which helps ALL pages (including the homepage) rank better.
5. Delete the default example post and page and add a contact, about and
legal page. Add some standard text to those pages. This is strictly for
legitimacy purposes.
6. Remove everything from the sidebar except for search, categories and the
random posts (added by the plugin.)
7. Rename the default category to the ArticleBuilder category. So, if you’re
getting content from the “Organic Gardening” category, name your
WordPress category “Gardening” or “Organic Gardening” (for example.)
Add Blog to ArticleBuilder
Now the site is complete! The last step is to simply tell ArticleBuilder to start
feeding it content!
Login to your ArticleBuilder account, click “Blogs” and add your blog’s url,
username and password.
and a maximum of 700 words. Set it to receive images and optionally
YouTube videos (it’s harder to match the videos with relevant content) and
optionally tell it to include injected content (it’s really not needed since most
of the content is already coming from ArticleBuilder.)
”"
DONE!!
Yep, that’s it! Now just add the site to AccurankTracker and watch the site
rise in the SERPs. Using this exact process others have gotten many blogs ranked in
Google and making regular Adsense cash and affiliate sales.
If you don’t already have an ArticleBuilder account, grab one via the link
below and give this system a try. It works! There’s a 100% satisfaction
guarantee, so give it a shot. If it doesn’t work get your money back. No risk
and there is a lot of money to be made!
Get ArticleBuilder Now at:
http://www.ArticleBuilder.net


0 comments:
Post a Comment
Comment moderation is enabled on this blog, so do not waste your time to spam.